Configure Combined Receipts
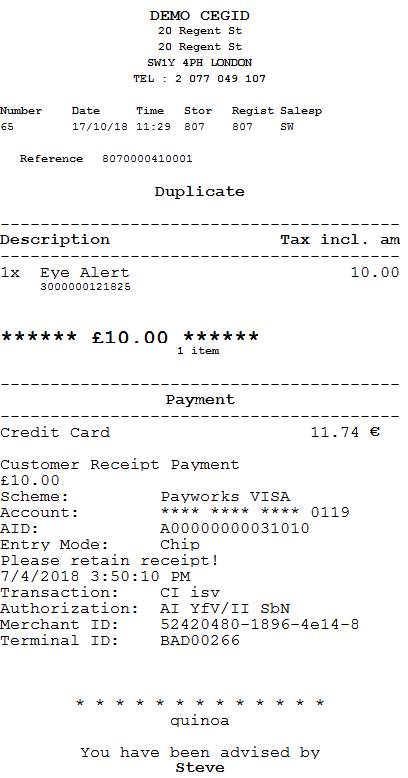
The Cegid Y2 Connector can be configured to produce combined EFT/VAT receipts. An example of a combined receipt is shown below.
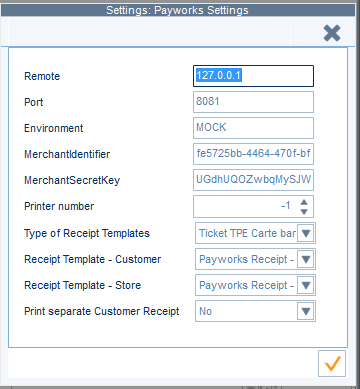
Step 1 - Disable the Customer Receipt:
In the EFT settings, set "Print separate Customer Receipt" to "No" to prevent the separate customer receipt from printing.
Step 2 - Edit the Receipt Template to include the receipt data:
Enter the receipt design mode by browsing to Printing Templates -> Sales receipts.
Open your sales receipt template.
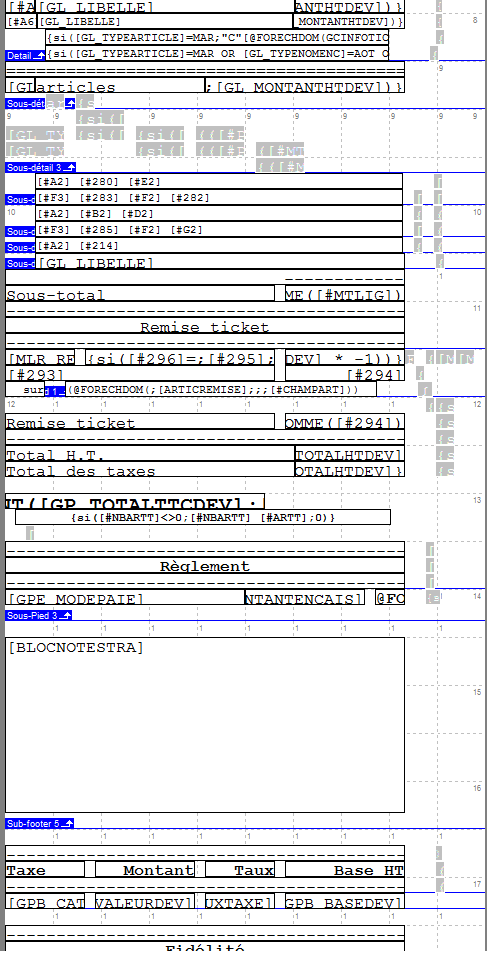
Create a new band by browing to "List of bands," then selecting the band that you would like to have just above the EFT receipt data (usually "Sub footer 3" or something similar).
Double-click the new band, then press
SQL
to set the data source. Enter the following query:[Nom_TOB_Source_SousBande=TOBECHES] SELECT *, MBE_BLOCNOTE BLOCNOTESTRA FROM PIEDECHE LEFT JOIN MPIEDECHEOLE ON MBE_NATUREPIECEG = GPE_NATUREPIECEG AND MBE_SOUCHE = GPE_SOUCHE AND MBE_NUMERO = GPE_NUMERO AND MBE_INDICEG = GPE_INDICEG AND MBE_NUMECHE = GPE_NUMECHE AND MBE_QUALIFIANTOLE = 'TRA' where GPE_NATUREPIECEG=:GP_NATUREPIECEG and GPE_DATEPIECE=:GP_DATEPIECE and GPE_SOUCHE=:GP_SOUCHE and GPE_NUMERO=:GP_NUMERO and GPE_INDICEG=:GP_INDICEG order by GPE_NUMECHE
Save your changes and leave the Band settings.
In Field properties, insert a new field with the settings shown below.
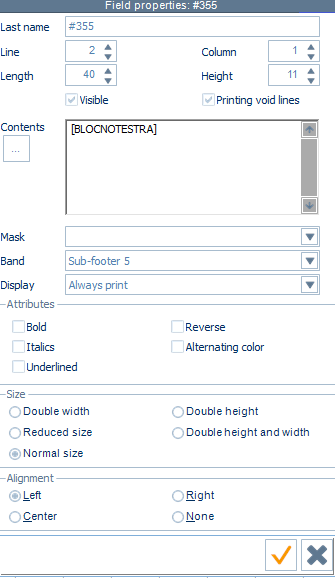
You may have to adjust the size of your new band to make the field fully visible.
An IF condition to delete the row may be required on every line so non-EFT receipts do not have excessive whitespace on. This can be detailed if required.